| Location: | (741, 933) |
| (Sky City Area) | |
| Type: | Timed Dungeon |
| Requirements: | Level 100 |
| Reawakening 2 | |
| Shifting Sky I | |
| Player Limit: | 8 to 10 |
How to get there:
- Go to Sky City’s Shadow Sanctuary (741, 933)
- Teleport via the Stone of Dreamland for a fee of 20,000 Yuan.
Frozen Hell will be added as a required dungeon to Clan Goals for the Clan Base and Bounty Hunter Quests. The goal is to kill the 10th boss, Lord of Disaster Soulshriek.
Mechanics:
Players who are level 100 Rebirth 2 with a minimum boundary of Shifting Sky 1 will need a Dark Jade Soulstone, which can be acquired from completing the This War o’ Mine Primal Quest once per day, it lasts for 24 hours and will expire if not used.
Frozen Hell Gatekeeper Sho at Sky City’s Altar of Shadows can send you to the Frozen Hell with the use of Dark Jade Soulstone.
Map:
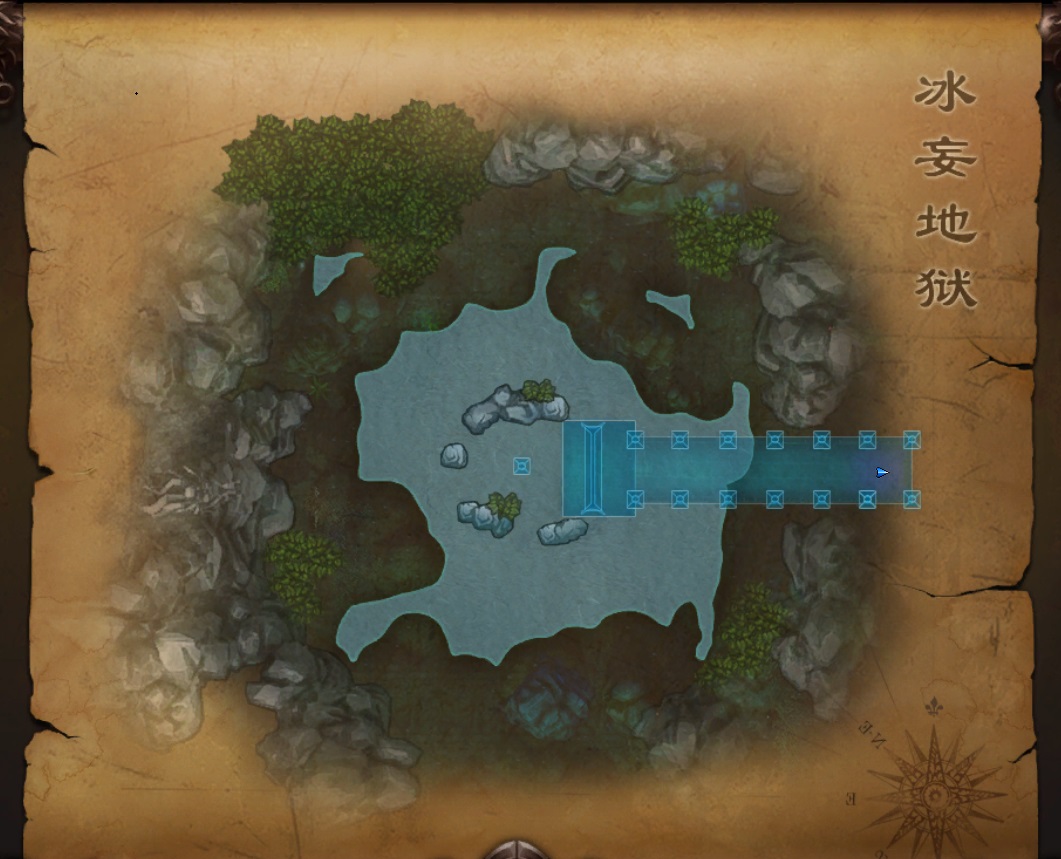
Overview
The dungeon has a time limit of 999 seconds (or 16 minutes and 39 seconds), which can be seen on an interface on the player’s screen
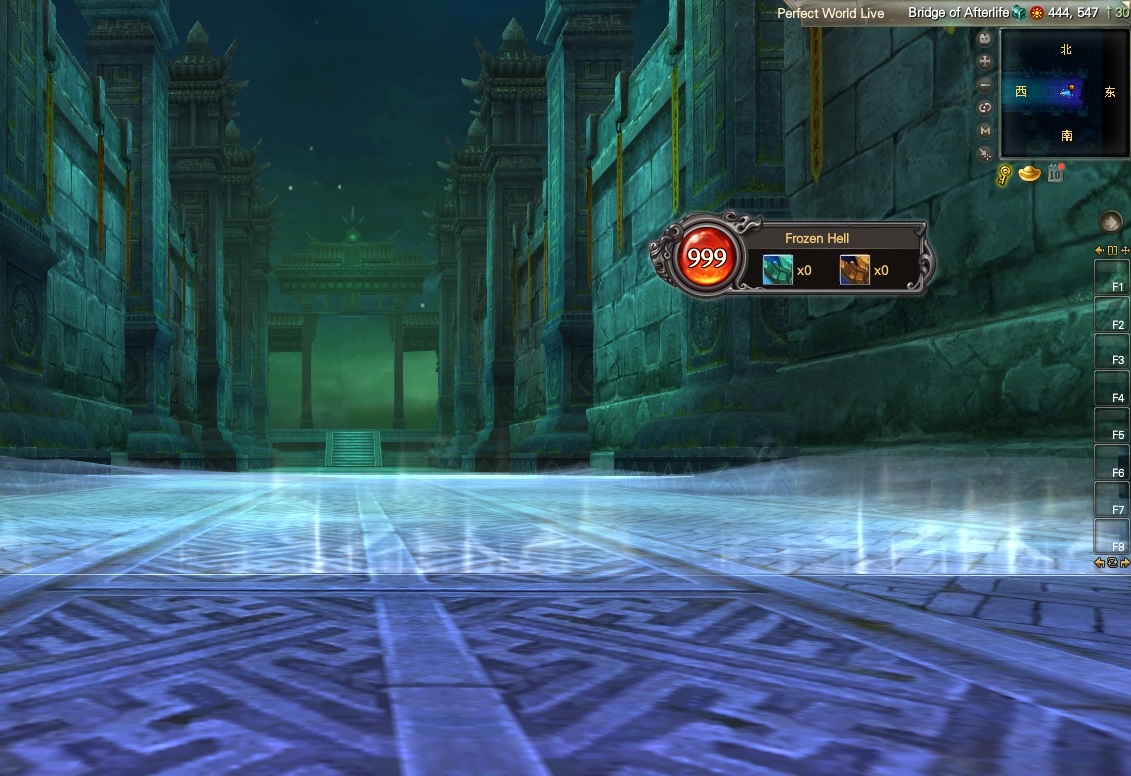
On this interface, there is also the stage number the Party is on (if any), along with the prizes the Party has earned thus far. The timer does not start running down until the Party leader starts the dungeon.
To start the dungeon, the party should have at least 8 members then run down the corridor and then jump off the edge into the water below.
The party leader will see a window appear with a Start button on it, which will start the challenge. The party leader should press this button once all member is in range and ready to begin. The timer will begin running immediately after the button is pressed.
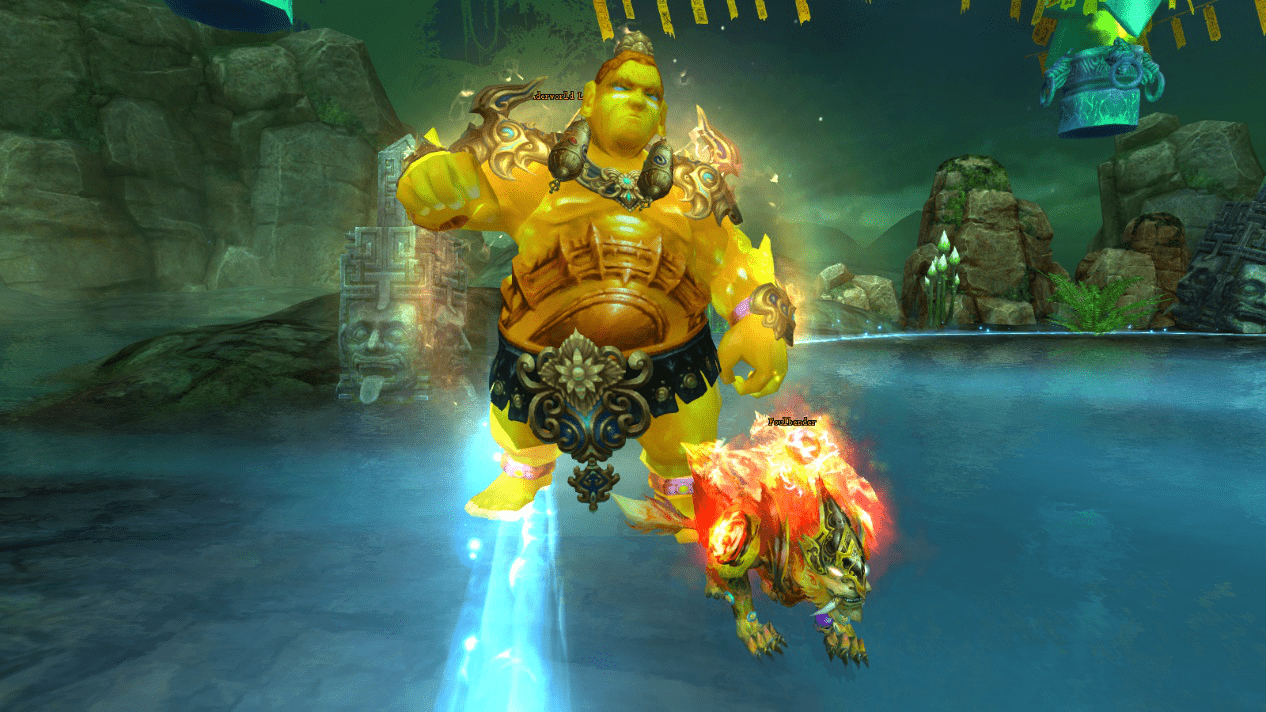
Frozen Hell has a total of 19 stages. Each stage consists of a boss fight, which is done in order; the bosses fought are not in a random order. Each boss can take a maximum of 1,000,000 damage per hit to prevent them from dying too quickly. If the Party reaches the final boss, Underworld Lord Chenzi, they can kill him an infinite amount of times for extra rewards as long as the timer is still running. When the timer runs out the boss currently being fought will disappear, and a window will appear showing the prizes the Party has earned for each player.
Daily Quest
Each day, upon entering Frozen Hell, players will receive an automated quest named Frozen Hell Melody. To complete this quest, players will need to kill Lord of Disaster Soulshriek, the 10th boss in the dungeon. Completing this quest will give the following Star Chart rewards:
Starglade Chest x1
Astrobana Pearl Lv1 x4
Astrospira Pearl Lv1 x4
Nebula Dust Orb x2
Bosses
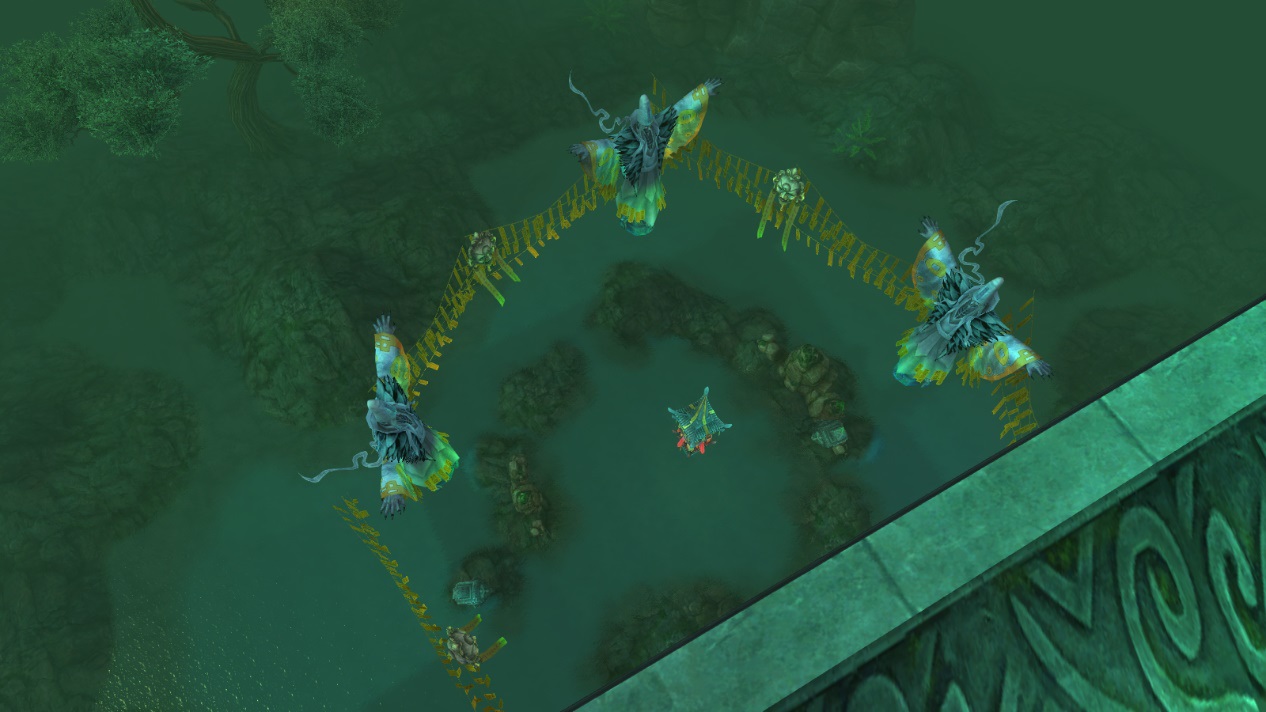
- 1st – Greedy Devourer Senmai
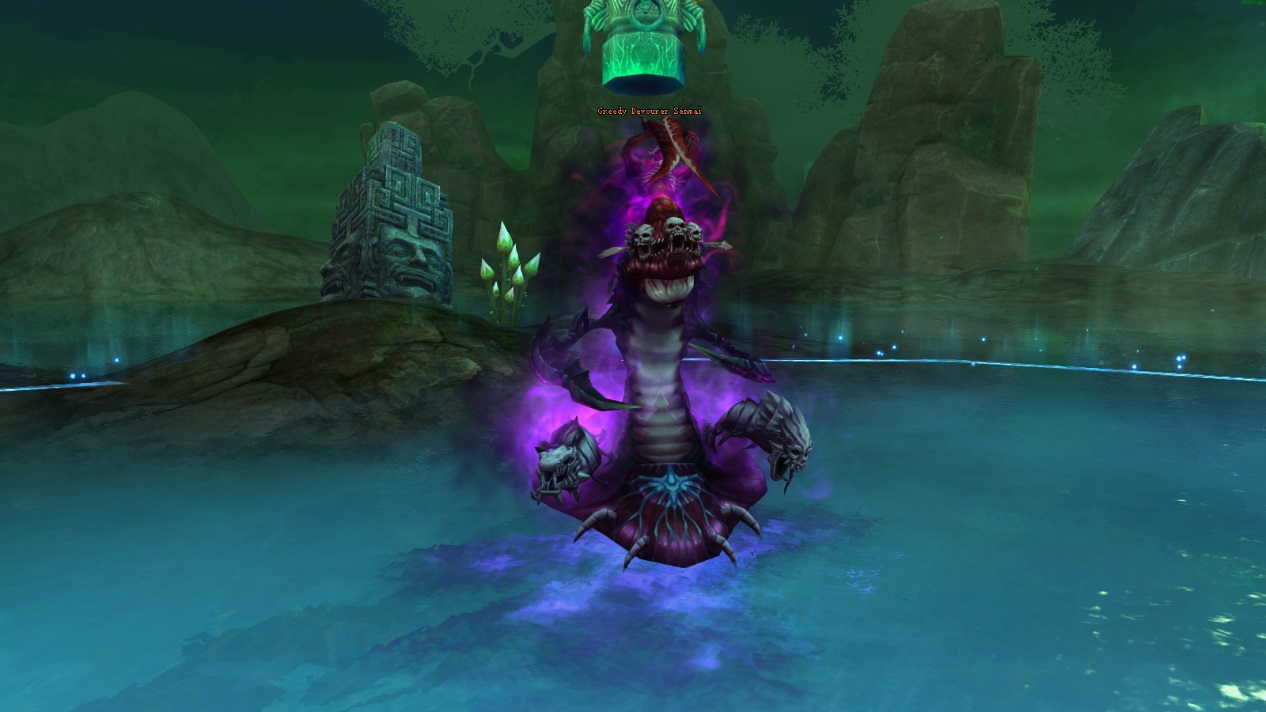
Greedy Devourer Senmai is the first boss encountered in the Frozen Hell. Shortly after the battle starts the boss will purge the whole Party and a Mirror of Devourer will spawn.
- 2nd – Butcher Baron Wenham
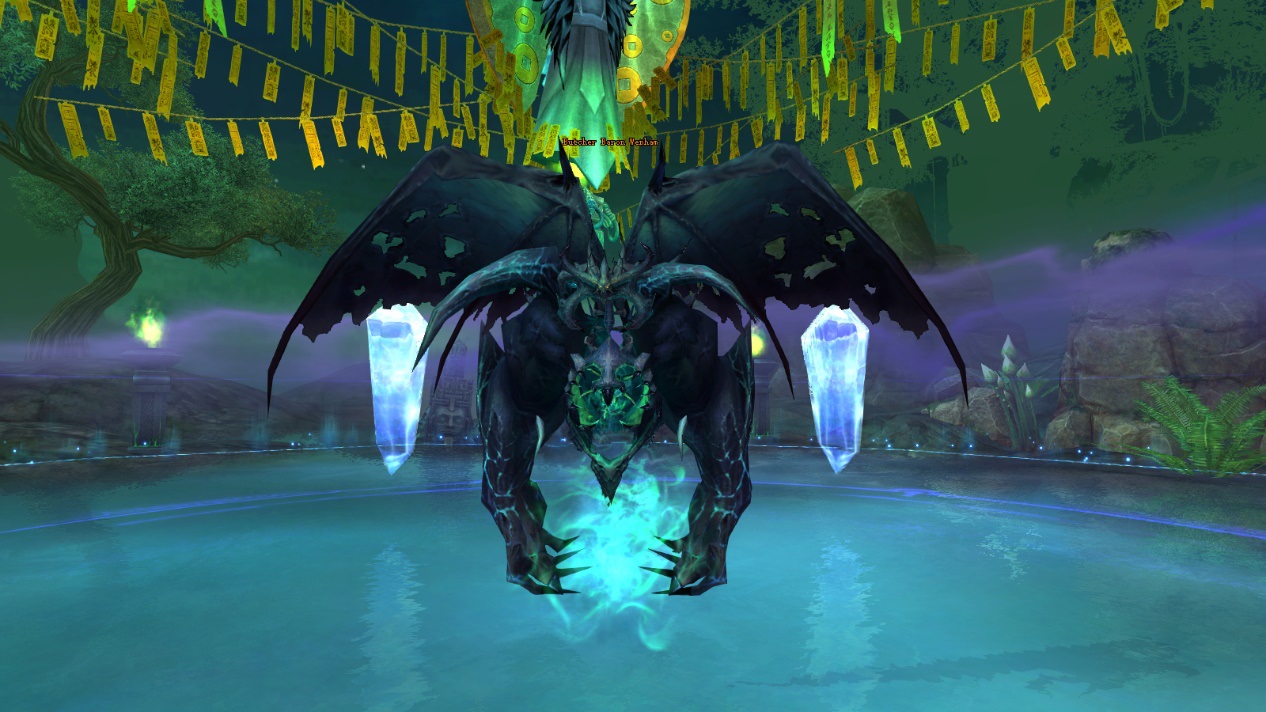 Butcher Baron Wenham is the second boss encountered in the Frozen Hell. Purple circles will appear on the ground which deal constant damage to players inside them, and also applies an increase damage taken Negative Buff to them. Players should avoid these circles.
- 3rd – Grim Phantom Loyan

Grim Phantom Loyan is the third boss encountered in the Frozen Hell. The boss begins with an 8 second heal over time as well as defense level buffs and a maximum health buff, which can be debuffed. An on-screen message will appear saying “Joys and Sorrows will be released in 10s. Please gather.” At this point players should stand together at close range. Afterwards, another on-screen message will appear saying “Players attack be Living Bomb will explode in 10s. Please stay away from the crowd”. At this point several players will have a bomb Negative Buff on them, indicated by a glowing aura above their head. These players should move away from the group. When the bomb’s timer runs out it will kill any nearby player.
- 4th – Molten Shield Blazehowl
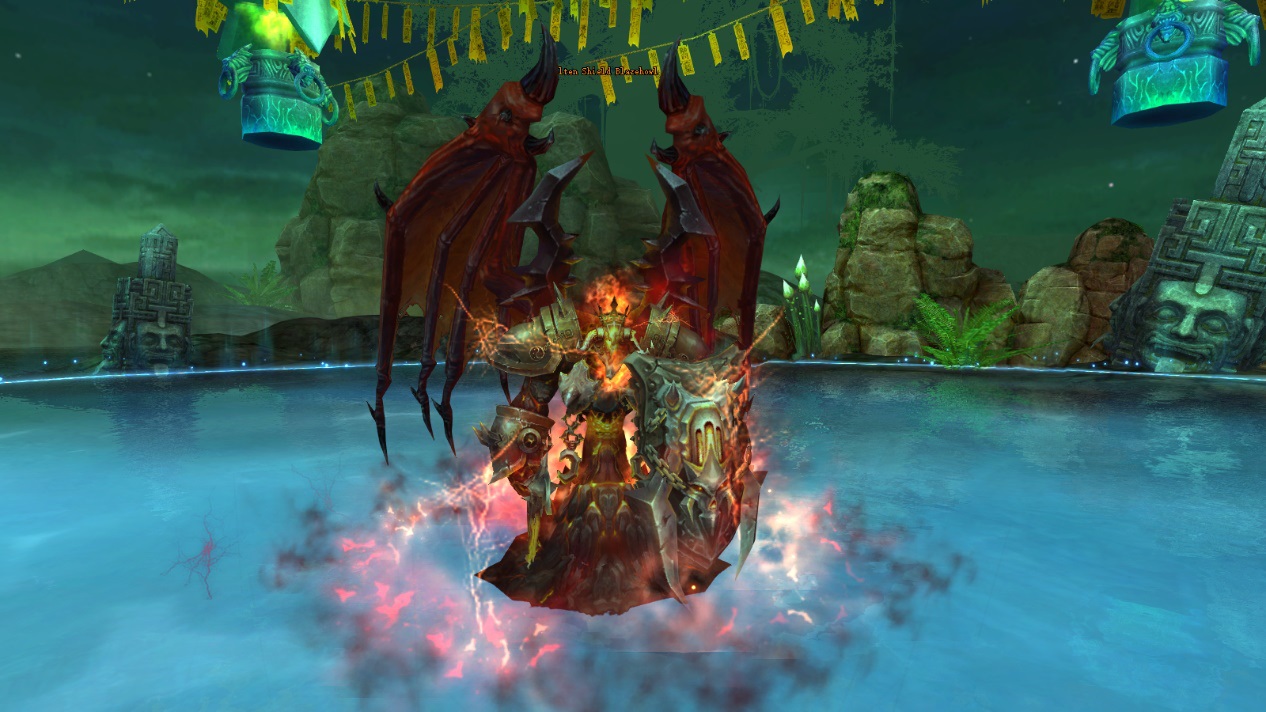 Molten Shield Blazehowl is the fourth boss encountered in the Frozen Hell. Two circles will appear on the ground – a red circle with swords in the middle, and a yellow circle with spears in the middle. A certain amount of players must stand in both circles to solve a math problem within 20 seconds. The math problem is mathematical, and usually in the form of [Players in the sword aura] x [Players in the spear aura] = number. For example, the on-screen message may say “Within the 20s: [Players of Sword Aura] x [Players of Spear Aura] =10”, which means that 5 players should stand in one aura while 2 players should stand in another aura, as 5 x 2 = 10. Other players should move outside of the auras to prevent being counted. If this is not done correctly, the boss will heal itself to full health.
- 5th – Lord of Grief Mistblade
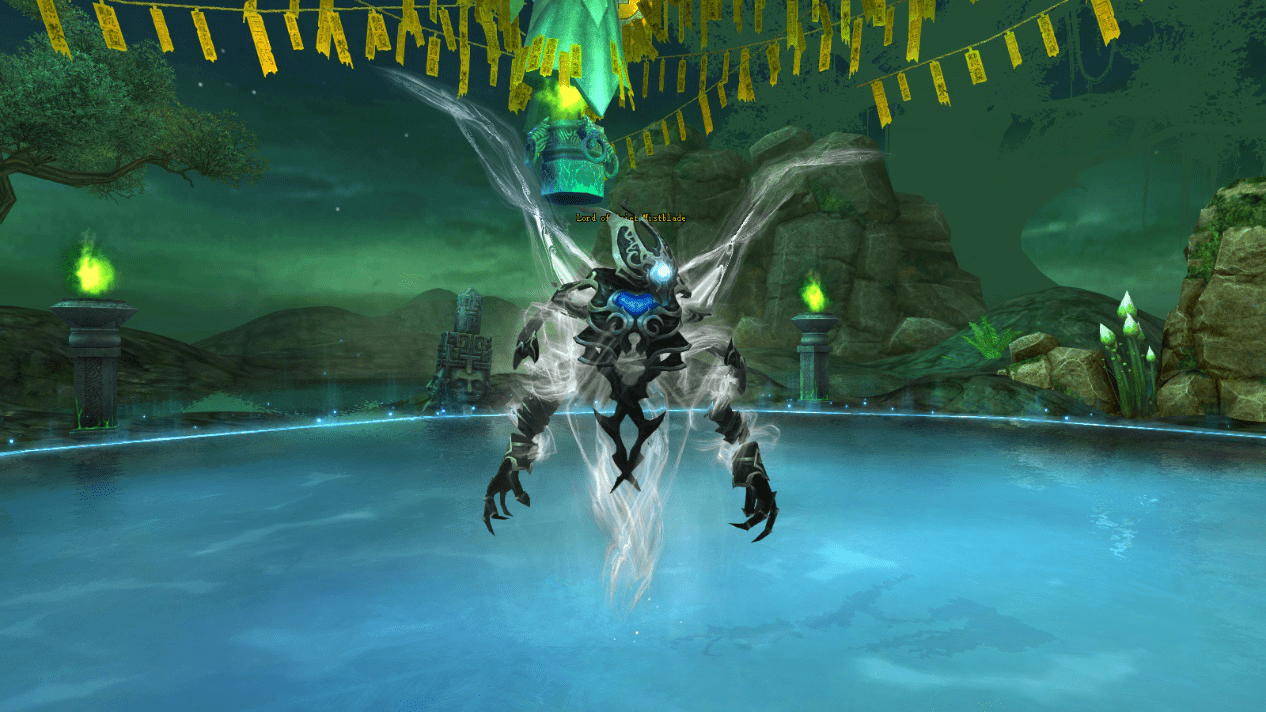
Lord of Grief Mistblade is the fifth boss encountered in the Frozen Hell. The boss begins with an 8-second heal over time as well as defense level buffs and maximum health buff, which can be debuffed.Lord of Grief Mistblade drops a total of 10 items. The drop chances are as follows:
– Immortal Stone: 30%
– War Avatar Pack C: 70%
- 6th – Soul Devourer Senjin
 Soul Devourer Senjin is the sixth boss encountered in the Frozen Hell. Upon spawning, two other monsters will spawn named Souleater Zor and Souleater Yul, and Soul Devourer Senjin will be immune to all damage. Souleater Zor and Souleater Yul must be killed at the same time in order to remove the immunity buffs from the main boss. The Souleaters will each have a 40-second buff that makes them immune to certain damage – one will be immune to physical damage, while the other will be immune to elemental damage. After the buffs wear off, they will swap to have the opposite immunities, and so on and so forth.On occasion, an on-screen message will appear saying “(Player Name), betray those so-called teammates!”. The player whose name was in the on-screen message will have a blue aura around them and they will be unable to attack. Any players within this aura will get an aura of their own, which can further spread to other players in the party. If a player’s name is in the on-screen message they should move away from the rest of the Party until the aura goes away.
- 7th – Cursed Grudge Eurion
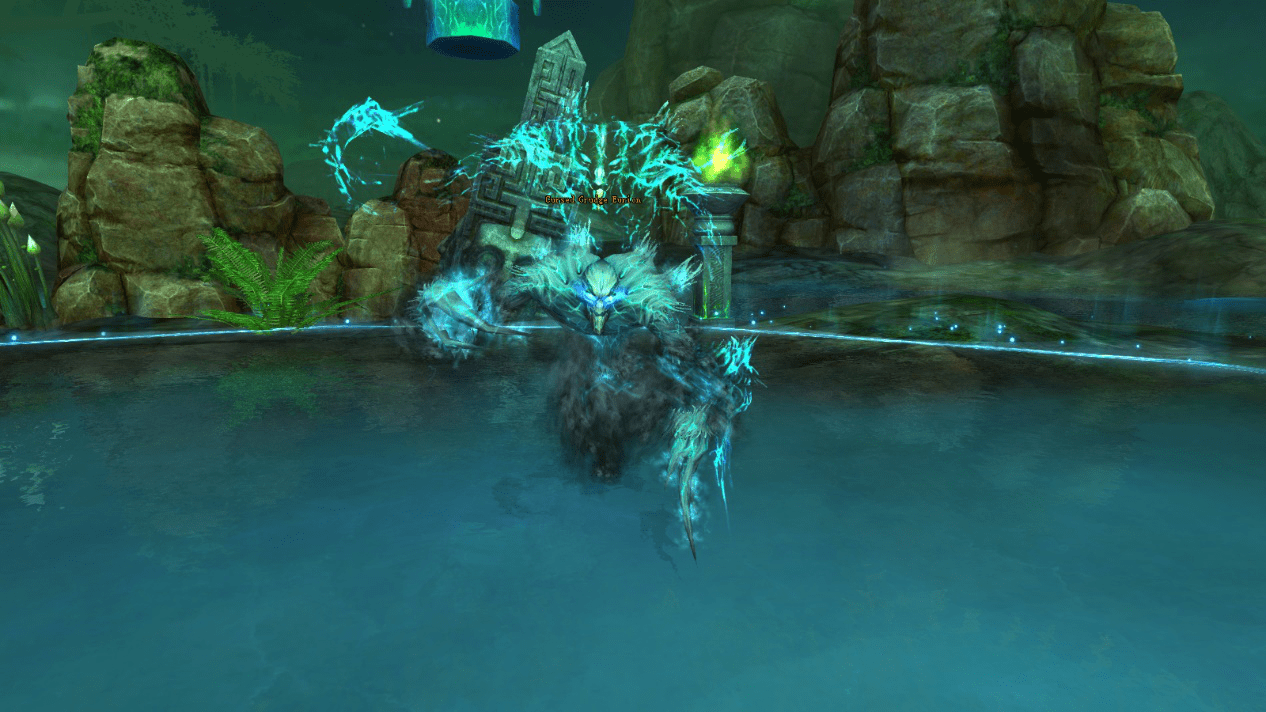 Cursed Grudge Eurion is the seventh boss encountered in the Frozen Hell. Upon starting the fight some players in the Party will have a Dark Link buff added to them as well as increased attack speed and channeling buffs. If these players attack the boss then it will heal its health, so they should refrain from attacking until the buff wears off. Cold Jade Crystals will also spawn on certain players which will freeze them, preventing them from attacking. The Cold Jade Crystals will not spawn on those with the Dark Link buff on. Other players in the party can attack and kill the Cold Jade Crystals to free their party members.After some time has passed, an on-screen message will appear announcing that Cursed Grudge Eurion will cast Djinn’s Waltz in the next 10 seconds. It is not known what it does.
- 8th – Venomous Feather Enkros
 Venomous Feather Enkros is the eighth boss encountered in the Frozen Hell. The boss cannot be damaged unless players are less than 8 meters away from it, so players will have to attack it from close range. The boss also has an aura around it which will damage players over time, which they will be forced to stand in order to deal damage to the boss. At times half of the area will be covered with a green light, which will deal damage to players if they do not move outside of it.
- 9th – Bloodthirsty Beast Churial
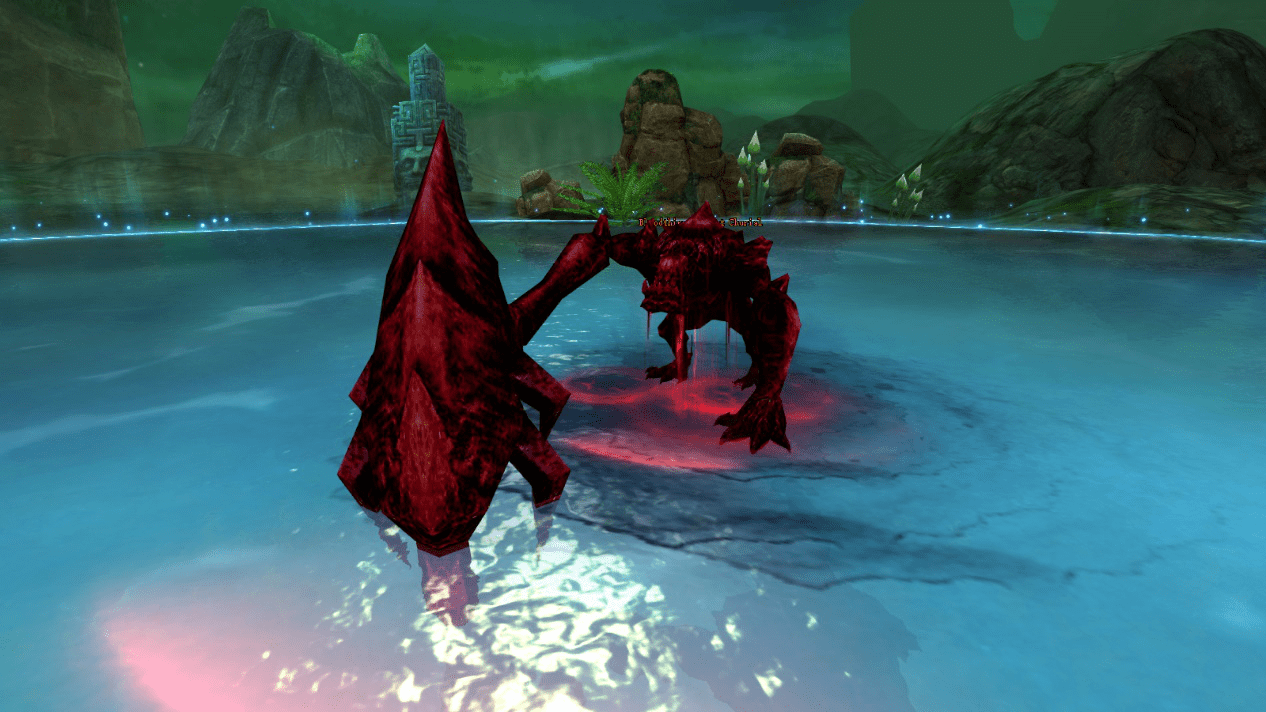 Throughout the fight, one player at random will have a Stalker Negative Buff added to them for 12 seconds, indicated by an eye above their head. The boss will target this player and begin to move towards them. The marked player should run away from the boss, being careful to not stand in the red cone in front of it. If they let the boss walk up to them and attack them then it will begin to heal itself. The target will change to another random player in the party after the Stalker Negative Buff has run out.
- 10th – Lord of Disaster Soulshriek
This boss is required for both the Frozen Hell daily quest and Master Bounty Hunter quests. The boss begins with an 8 second heal over time as well as defense level buffs and a maximum health buff, which can be debuffed. It will also constantly purge the Party’s buffs and cast a Mana drain Negative Buff on them.Drops 20 random items:
Immortal Stone: 25%
War Avatar Pack C: 50%
Benevolence Seal: 5%
Strongwind Badge: 15%
Garan Stone: 1.5%
Kunwoo Blade: 3.5%
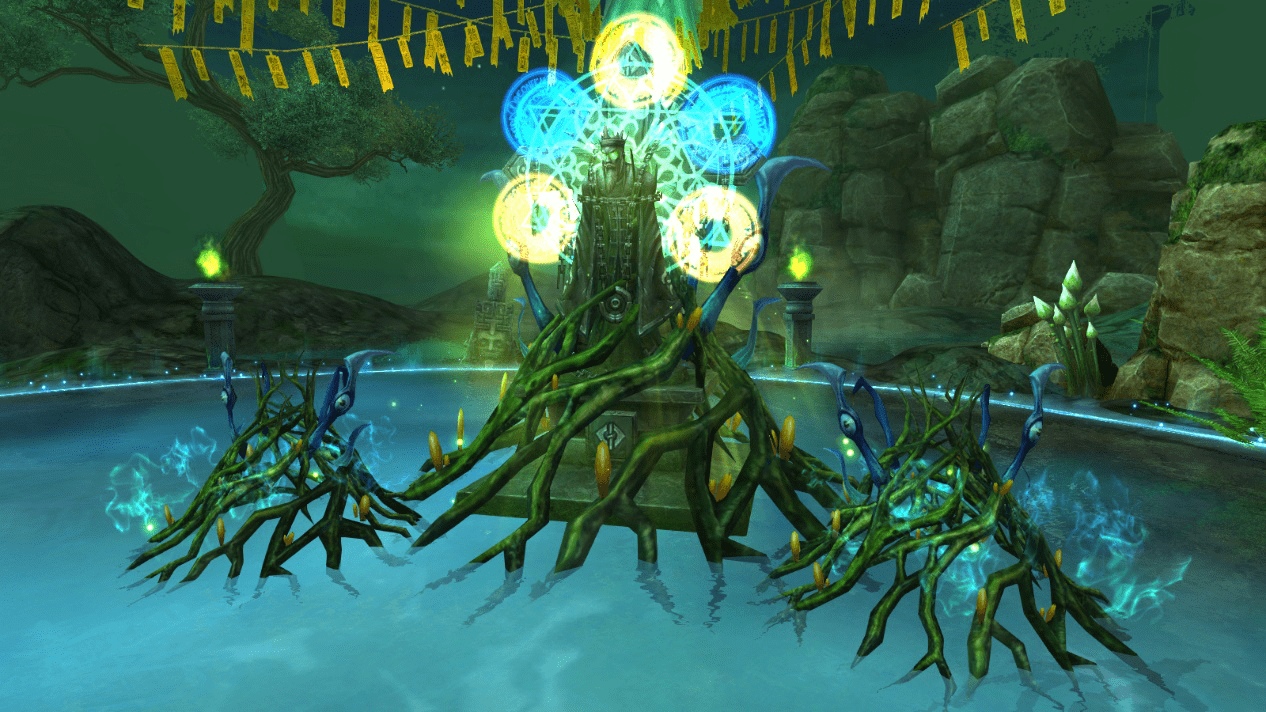
- 11th – Sylvan Keeper Lortan
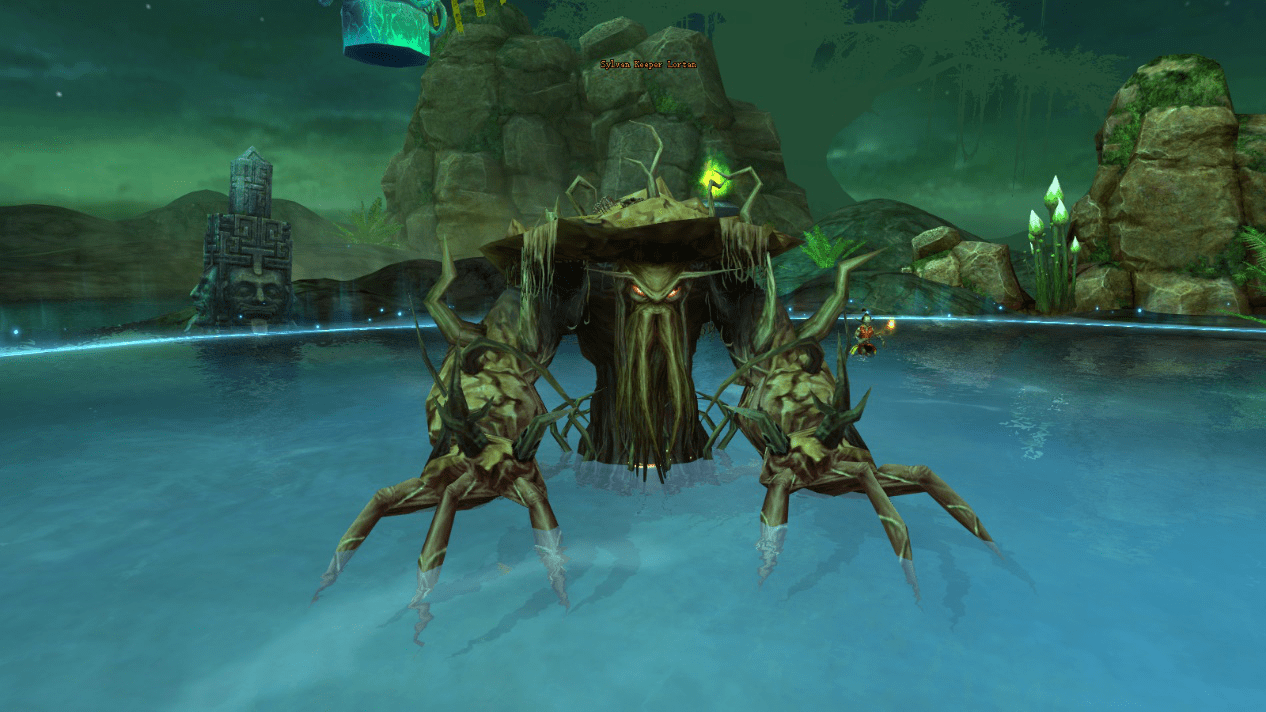
The boss begins with an 8-second heal over time as well as defense level buffs and maximum health buff, which can be debuffed. Upon starting this boss he will buff himself with a Soul of Vengeance-like reflect buff, which reflects a deadly amount of physical damage to players who attack him and cannot be debuffed normally. The reflect can be bypassed by using immunity skills or physical immunity skills such as Stasis or Will of the Shaman. In addition, an on-screen message will appear on occasion indicating that non-Yao Shou who is standing in front of the boss will be Negative Buffed. If non-Yao Shou is in this range they will be stunned and given a curse Negative Buff which increases the damage they take.Three other monsters will spawn around the area named Explosive Minion. These monsters are immune to damage and will completely drain a player’s Chi if they are too close. When a player with Chi attacks one from close range a timer will appear above the player’s head, counting down from 10. The timer will not appear if they do not have a minimum of two Chi (200 vigor). The player must then stand right at Sylvan Keeper Lortan before the timer reaches 0. If they do this successfully then the reflect buff will disappear allowing the Party to attack the boss without being harmed. The boss can potentially rebuff itself with the reflect buff, so this step should be done repeatedly.
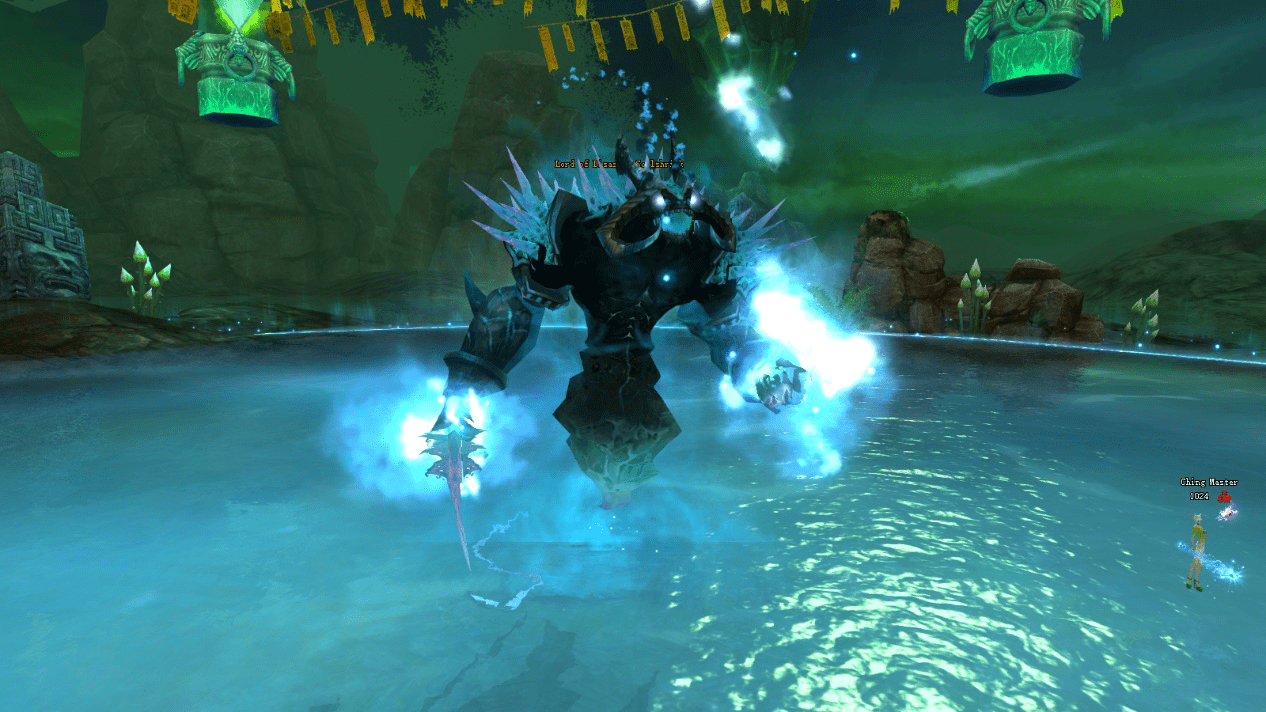
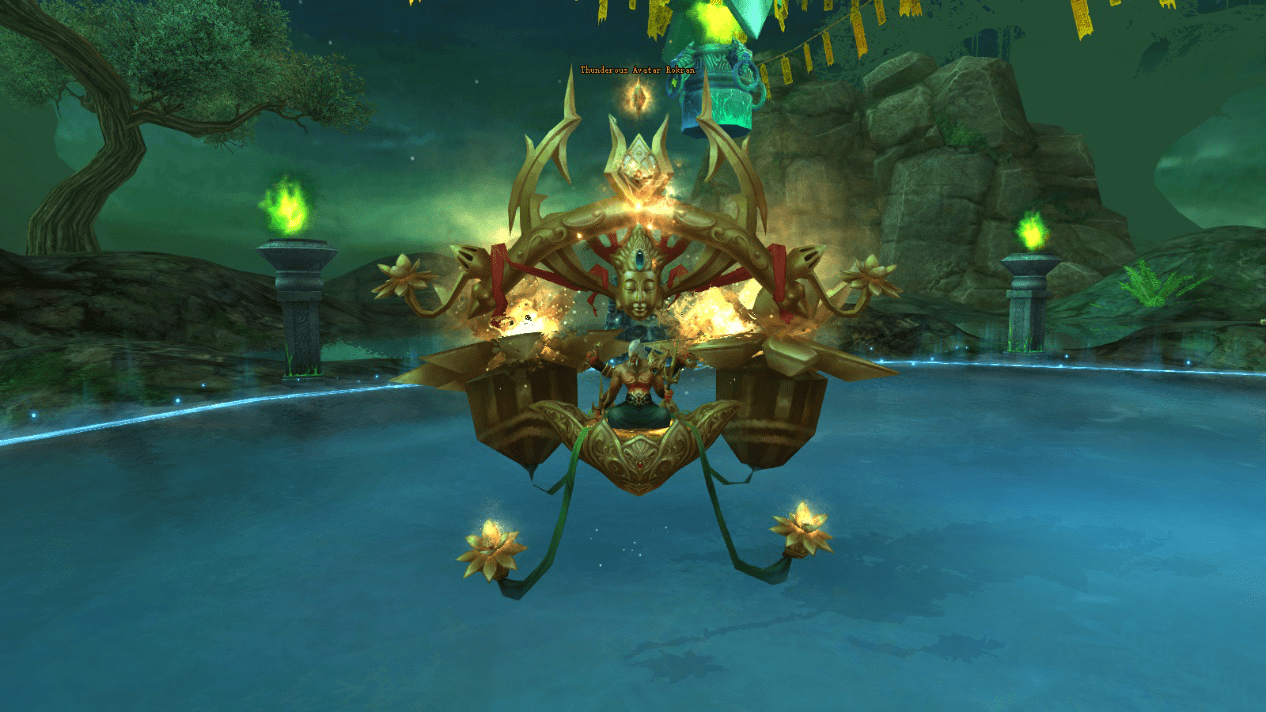
- 12th – Thunderous Avatar Rokran
The boss begins with an 8-second heal over time as well as defense level buffs and maximum health buff, which can be debuffed. The boss will also be immune to physical and elemental damage. A Thunder Trap will appear, which can be dug to unleash a Thunderball area on the ground. If the boss is lured to this area then its buffs will be removed, allowing the party to deal with damage to it. 10 seconds after the Thunder Trap appears the boss will AoE the Party. This process repeats itself throughout the battle.
- 13th – Necrotic Doom Angtus
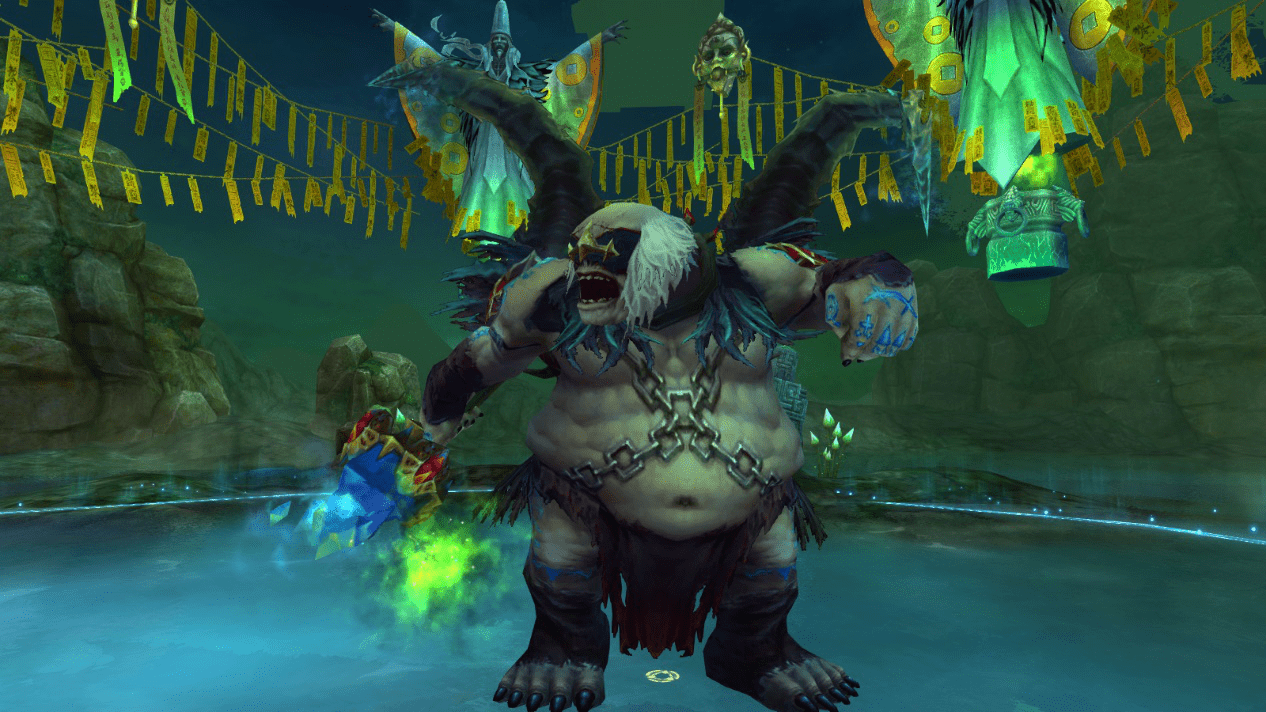
It will curse the player that is standing closest to it, which can stack. If the curse stacks up to 5 times then that player will die, making the boss a threat particularly to classes who attack from melee range. It will also occasionally AoE the Party and stun them for a short period of time.
- 14th – Underworld Judge Ostav
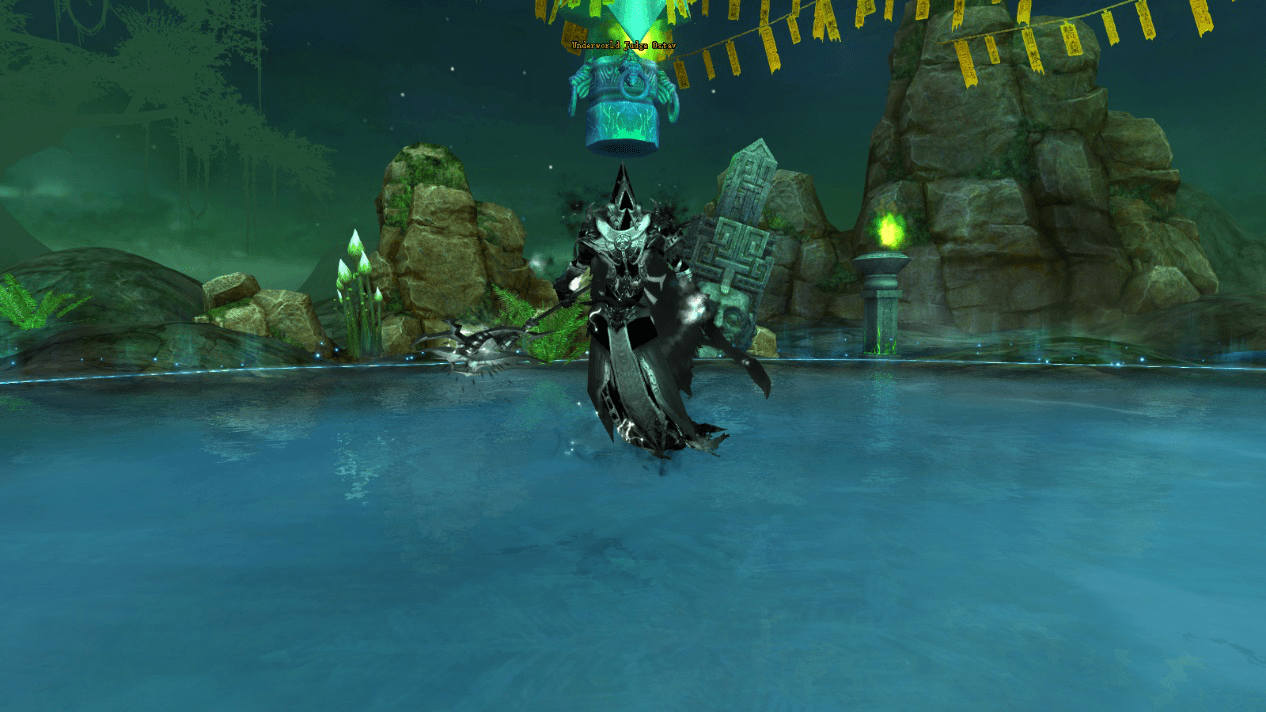
An on-screen message will appear stating “(Player Name), you’re guilty!” after which the player whose name is in the message will have a bomb placed on them. A red circle will also appear underneath them. This player should be dispelled as soon as possible or the bomb will explode and kill the rest of the party, even if they are not standing in the red circle. The players that are standing inside the red circle when the bomb-carrying player is dispelled will be paralyzed for a short amount of time.
- 15th – Night Templar Kivon
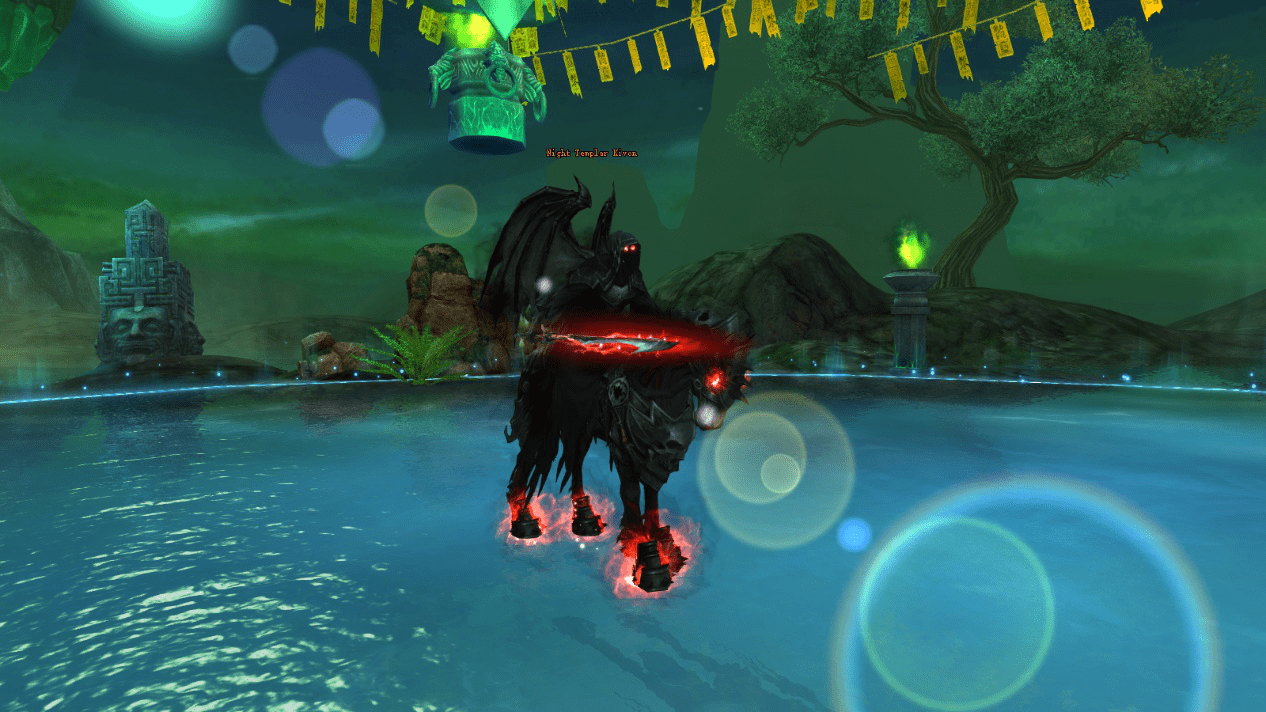
Night Templar Kivon is the fifteenth boss encountered in the Frozen Hell. The boss begins with an 8-second heal over time as well as defense level buffs and a maximum health buff, which can be debuffed. It will constantly purify itself of Negative Buffs by transferring them to other players. The boss will also AoE the party and drain all of their Chi constantly. The boss will heal itself if a player dies.Drops 24 random items:
Immortal Stone: 33.33%
War Avatar Pack C: 62.5%
Blue-Sea Dragon Ball Shard: 4.16%
- 16th – Magma Serpent Honga
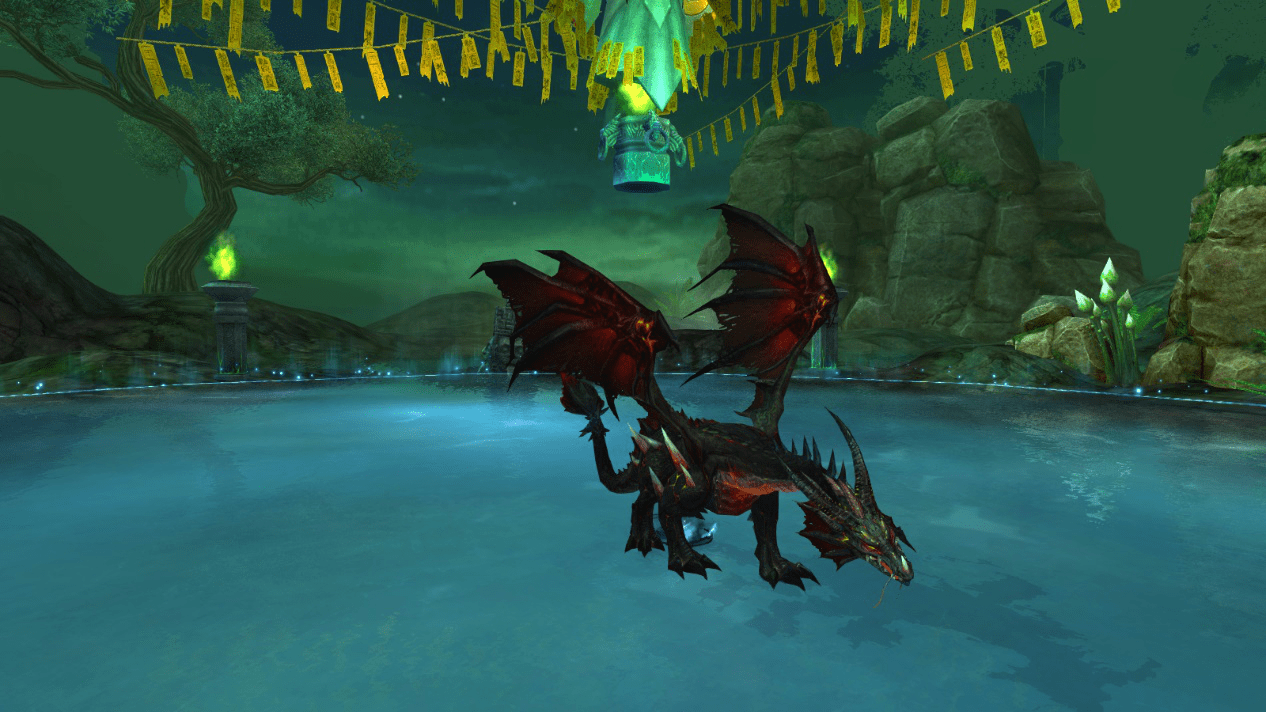
The boss begins with an 8-second heal over time as well as defense level buffs and maximum health buff, which can be debuffed. It cannot be damaged unless players are less than 8 meters away from it. A Yao Shou must tank the boss as it will constantly kill any other class that has aggro. The deadly attack can be avoided by non-Yao Shou’s if they use well-timed immunity skills.Five Fireprime Hounds will also spawn around the boss, all immune to damage and inactive. Eventually, one of these hounds will become active, lose its immunities, and will begin to kill off party members randomly, indicated by an on-screen message. The hound should be killed quickly to prevent it from killing party members, and can only be damaged if players are less than 8 meters away from it. As the battle progresses other hounds will also become active and should be killed as soon as possible.
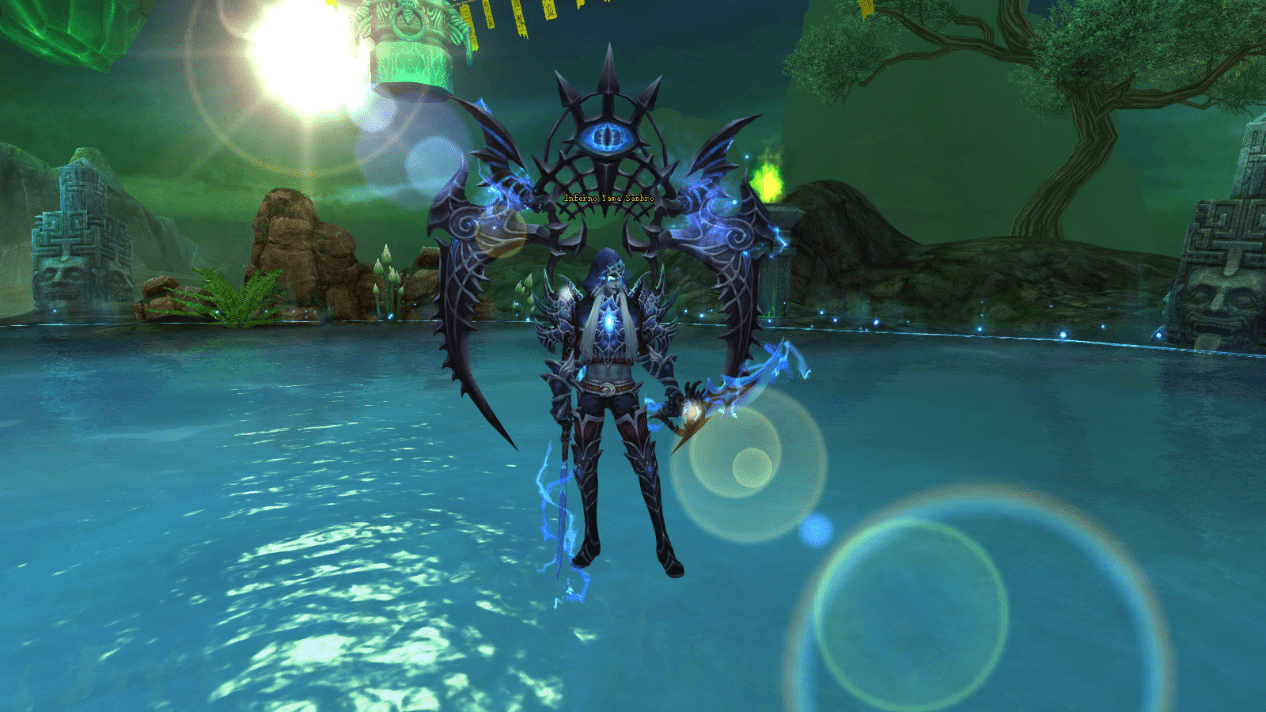
- 17th – Inferno Yama Sanhro
It will constantly deal damage to players near it, and on occasion will make itself untargetable to the party. Players can continue to deal damage to it in this state if they have a constant AoE running, such as Dragon’s Breath or Yataghan Vortex. After some time, the boss will disappear and several clones will spawn and AoE the party. These clones must be killed in order for the original boss to spawn again. The clones will keep multiplying and they will get progressively stronger. When the boss respawns, it will appear with much less health than its first version.
- 18th – Bodyfall Scavenger Namina
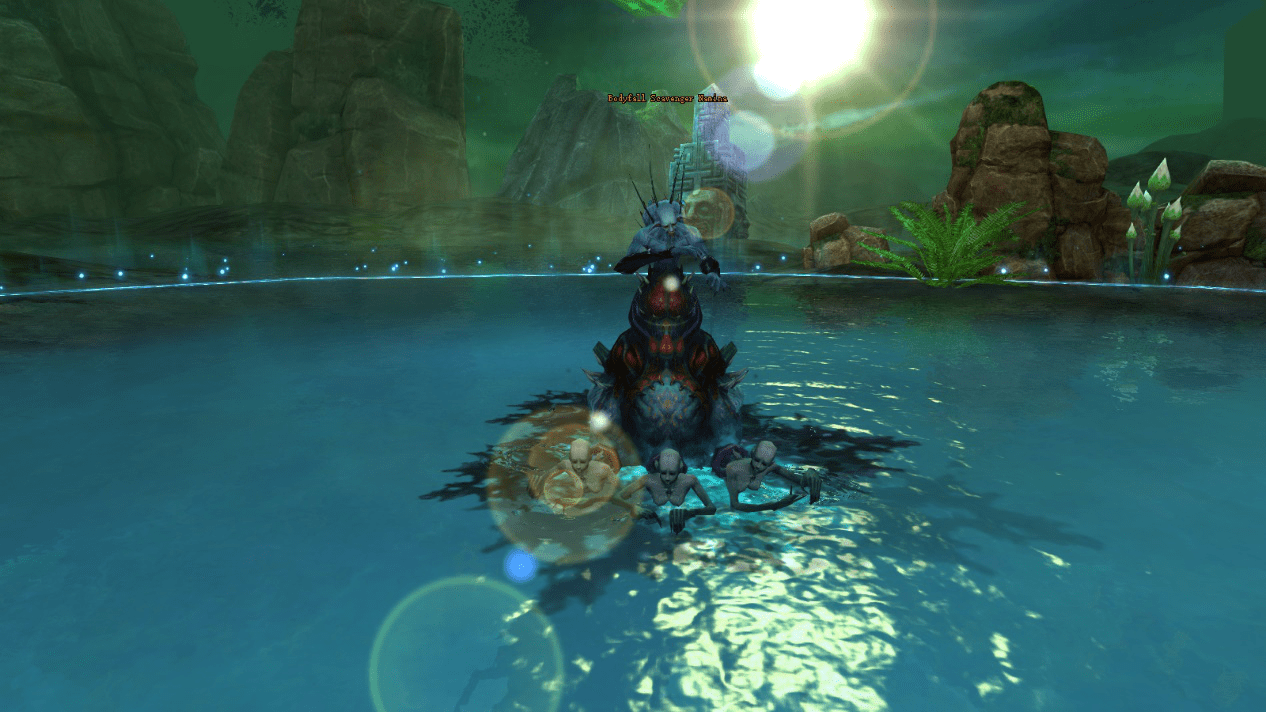
Five pools will appear around the boss, with a light yellow circle in the middle of each. These pools will get bigger over time and will damage players if they stand within them. The pools will reduce in size and disappear if a player stands in the light yellow circle within the pool, though the player will constantly take damage while doing so. These pools will respawn again over time.Occasionally a cone will spawn facing towards a random player in the Party, which will kill anyone within its range. Players can evade death by using a well-timed immunity skill.
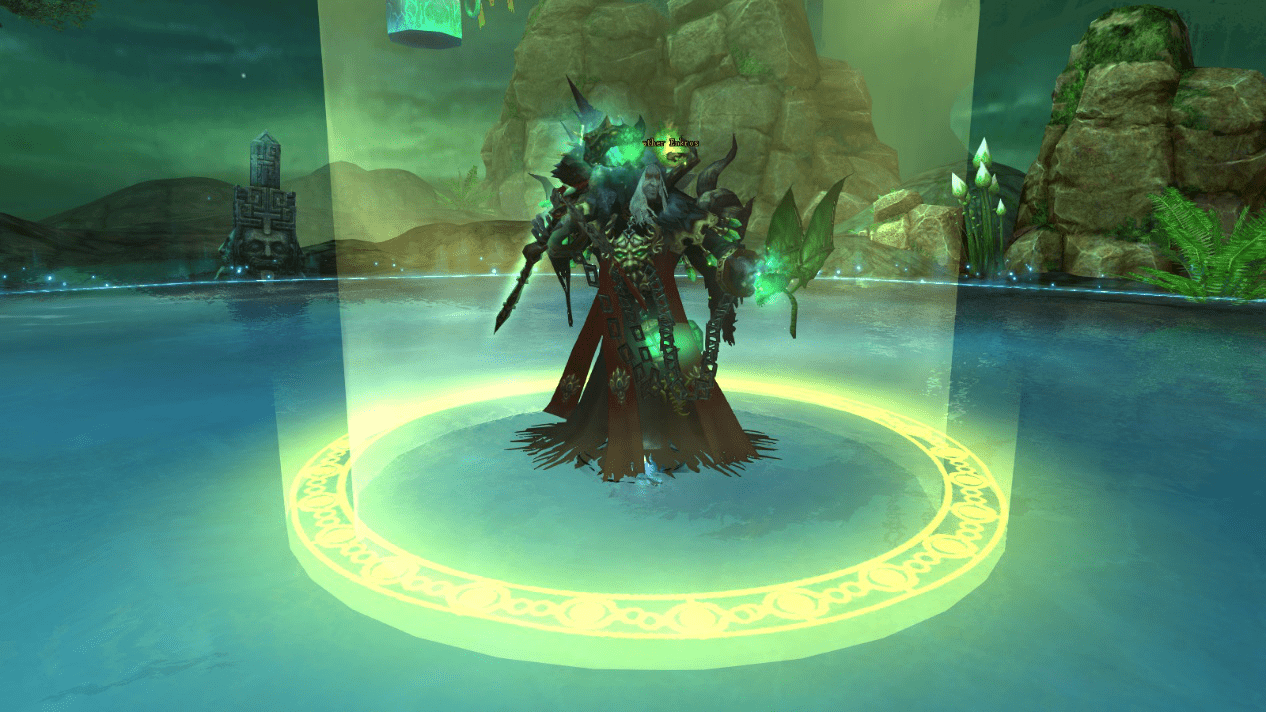
- Final – Underworld Lord Chenzi
- Underworld Lord Chenzi is the nineteenth and final boss encountered in the Frozen Hell. The boss begins with an 8-second heal over time as well as defense level buffs and maximum health buff, which can be debuffed. A Yao Shou should tank the boss as he will perform an attack indicated by a red rectangular area in front of him, which will kill non-Yao Shou that are within the area.An on-screen message will also appear stating that the boss will cast Oblivion and should be interrupted. Players can use channel-interrupting skills to prevent the attack from occurring. If players fail to interrupt the boss, the Oblivion attack will kill the whole Party. Players using the Genie skill Faith or Yao Shou using Ex Eternal Warrior with a Sanguine Glyph effect can avoid Oblivion’s damage. At certain intervals, players will be affected by Bleed and Burn DOTs. Dog monsters will spawn and attack random players. These dogs cannot be killed so players will have to tank the damage or run around to avoid the damage.Upon his death, the boss will reappear allowing the Party to kill him repeatedly for extra rewards until the dungeon’s timer runs out. Every time the boss respawns it will have more Health than the previous one, the DOTs will deal more damage and more dogs will spawn.Drops between 10 and 30 items:
Golden Glyph Lv1: 18.66%
Verdant Glyph Lv1: 18.66%
Ethereal Glyph Lv1: 18.66%
Sanguine Glyph Lv1: 18.66%
Argent Glyph Lv1: 18.66%
Blue-Sea Dragon Ball Shard: 6.66%
Rewards
For each stage completed the Party will earn prizes. The prize will be either 1 Hell’s Glowstone or 1 Underworld Goldstone, depending on the stage that is cleared. These prizes are received at the end of the run.
Stages 1 – 9: 1 Hell’s Glowstone for each stage completed
Stages 10 – 19: 1 Underworld Goldstone for each stage completed
When the time limit runs out, a window will appear showing the prizes that the Party has earned for each player. Players can redeem their rewards by clicking the “Receive reward” button. If they close this window or cannot click the button, they can leave the dungeon and receive their prizes from Frozen Hell Messenger Eli, located at the entrance of the dungeon (741, 933).
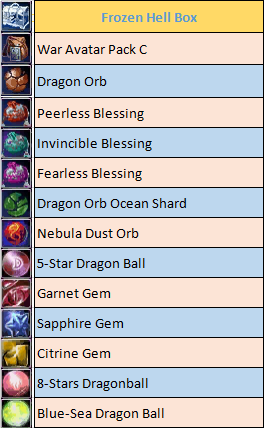
Bosses will also drop items from stages 5 (Lord of Grief Mistblade), 10 (Lord of Disaster Soulshriek), 15 (Night Templar Kivon), and 19 (Underworld Lord Chenzi). These items include War Avatar Pack C, Level 1 Glyphs, Immortal Stones, Rank 8 Recast materials, and more.
Exchange:
Download the Game [Click here]
Register for an Account [Click Here]
Reference: gamepedia