The Altar of Saintess is a dungeon located in the Avalask. Players can enter this dungeon by talking to Recruit Officer Taylor in Polydeux (536, 707). Players can also teleport to the entrance of the dungeon via the Illusion Stone in Dragon City for a fee of 20,000 silver coins. It is available to players who have reawakened twice, are level 105, have a Boundary level of Royal Sky I, and have reached Celestial Saint esteem.
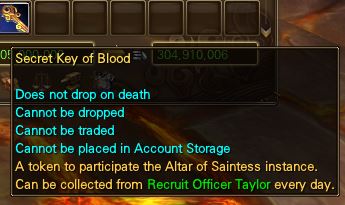
Players will need a Secret Key of Blood, which can be acquired once per day from Recruit Officer Taylor in Polydeux (536, 707).
The key lasts for 24 hours and will expire if not used.

Don’t forget to take the quest “Instance:Altar Mystery” from Teleporter Kalvia, once done you can teleport to the main dungeon.
The party leader can activate the dungeon by taking the quest “Activating Altar of Saintess”.
If players die in the Altar of Saintess entrance (where Teleporter Kalvia is) instead of in the main dungeon, they should not return to the nearest town or they will be teleported out of the dungeon. For this reason, it is recommended to have Resurrection Scrolls in your inventory.
First Challenge – Elemental Chains
The first part of the dungeon involves having a certain number of players gathering at the top of certain elemental chains. The party will have 90 seconds to complete this task. If the party fails, the party leader can restart the challenge.
There are four different elemental chains: Fire (northwest corner), Thunder (northeast corner), Wind (southeast corner), and Ice (southwest corner). Players can open the map by pressing the M key to see the locations of each elemental chain. When the party leader activates the challenge, multiple messages will appear in the chat box. Each message will show how many players need to be at the top of each elemental chain.
When the challenge begins, players will need to climb their way up a certain elemental chain until they reach the top, and stand close to the mob that is at the top of the chain. Players will need to climb carefully up the chains as it is possible to fall and die in the lava below. It is recommended to take your time climbing up and to avoid using speed skills such as Holy Path as it will make you prone to rubberbanding. If you do die, it is possible to revive and teleport back into the main dungeon area and climb up the chain again before the 90 seconds is up.
Players will need to stay at the top of the chain until the 90 seconds is up. Once the timer is done, messages will appear in chat to indicate whether a certain element failed or succeeded. If all elements succeed, then a message will appear on-screen saying “Success!” and all players will be teleported to the center of the dungeon.
Activating Easy or Hard Mode
After completing the first part of the dungeon, Saintess Anlu will appear in the middle of the dungeon trapped in vines. Whatever target gets hit first by any player will activate its corresponding mode. Players should not attack anything yet until it is established which mode the party intends to do.
- If you want to do the easy mode (Punish Seind) for Barbaric Blood Crystals, hit Saintess Anlu first.
- If you want to do the hard mode (Three Women Died) for a Glyph Pack LV3, hit the vines first.
The party leader can find the correct target by using the Tab ↹ key and have other players assist attack them so that they are also targeting the correct target. It is not advisable to use an AoE as your first attack. If the wrong mode gets activated, it cannot be reversed and the party will have to attempt to complete whichever mode was accidentally activated.
Punish Seind (Easy Mode)
To activate this mode, hit Saintess Anlu first. If you hit the vines first instead, you will activate hard mode instead. This cannot be reversed.
The party can attempt this challenge an unlimited amount of times until they succeed.
Shortly after attacking the boss, red circles will spawn on each player which is also known as the Saintess’ Tears. Players need to move out of these circles or they will be killed after a short time. Players should also count the total number of red circles that spawn on themselves. This is important for the next part.
When 8 or 9 red circles have appeared under each player, 2 domes will appear – a blue dome on the north side of the platform, and a yellow dome on the south side of the platform. Players will have 10 seconds to enter the correct dome before Saintess Anlu releases her anger. If 8 red circles appeared under each player, stand in the yellow dome to the south; if 9 red circles appeared under each player, stand in the blue dome to the north. Once Saintess Anlu releases her anger, she will continue to kill any player not in the correct dome for 25 seconds. If you die during this part, do not resurrect until Saintess Anlu has finished her attack (when the countdown goes to 0). This phase with the red circles and domes will repeat every minute.
An easy way to tell if you are in the correct dome is to check your buffs. If you have a buff, then you are in the correct dome. If you are not in the correct dome, you can use an immune potion (such as Fortification Powder) and the God’s Path (Genie Skill) to run to the other dome. Players can also use a long-lasting Faith skill such as Yao Shou’s Sanguine Ex Eternal Warrior or Yu Ling’s Ex Blessing of Protection. It is not advised to have buffs such as the Xi Shou’s True Wisdom King’s Chant buff active during this time as they may not receive the buff even if they are in the correct dome, which will result in death.
Saintess Anlu will also randomly buff herself with a Soul of Vengeance buff and a Faith buff for 20 seconds. Players will receive a warning before this happens. An on-screen message will appear that says “Be careful! The Saintess will reflect all damages after 10 minutes”. The on-screen message is not accurate; she will buff herself 10 seconds after the message appears. She will purify herself, and then buff herself with Soul of Vengeance and Faith for 20 seconds. Players should avoid hitting her during this time.
At random intervals, a Sacrifice Monster will spawn and attack a random player. That player will receive a whisper from the Sacrifice Monster. The monster should be killed within 20 seconds. The monster will constantly paralyze the player and deal damage to them. If the Sacrifice Monster is not killed within 20 seconds, that player will die and Saintess Anlu will gain one layer of a protective buff that makes her take 10% less damage. In addition, a Slimy Mud will spawn which will knock players back throughout the fight, including during the dome phase. It cannot be targeted or damaged.
Seind appears after Saintess Anlu is killed. He is not aggressive by default, allowing the party to prepare for the next fight. Seind has 2 different phases.
Note that there are 4 Spirit Trees on the platform near the boss. It is vital for the party to grow at least 1 Spirit Tree in order to survive the 2nd phase, which can be done by following the mechanics in the 1st phase. There are also 6 Altar Guards spread around the boss which will be needed to avoid one of Seind’s deadly attacks.
Phase 1
In order to successfully survive the 1st and 2nd phase, the party should avoid nuking the boss. If the boss goes below 50% health, it will be impossible to grow Spirit Trees which are required to survive the 2nd phase of the fight.
At the beginning of the fight, 5 Crystal Saintesses will spawn on the boss, and eventually, a purple fan will appear on the ground behind the boss. These crystals must be pushed into the purple fan within 15 seconds, or Seind will kill the entire party. Skills such as Wu Xia’s Reel In or Yu Xia’s Churning Vortex can be used to move the crystals into the fan. The crystals are also immune to damage so the party should be careful that they do not accidentally destroy them.
Once all the Crystal Saintesses are in the fan, one of the Spirit Trees will grow into a sapling. Repeat the process once more with the crystals to grow the Spirit Tree into its next form. After 1 minute passes, the Spirit Tree will finally evolve into a Mature Spirit Tree. You can repeat this process to grow more Spirit Trees. It takes 2 crystal rounds per tree and it is recommended to have between 1-3 Mature Spirit Trees depending on your party’s firepower. Do not attack Mature Spirit Trees during this phase; they are vital to survive the mechanics of the 2nd phase.
When Seind is at 50%, 30%, and 10% health, she will prepare to use her deadly attack, Hellfire. After 20 seconds passes, she will cast Hellfire for 20 seconds which can kill the entire party if they are not properly protected. Players can protect themselves with the use of the 6 Altar Guards surrounding the area, though 1 of these guards will be a fake.
Players should spread out to the 6 Altar Guards when the on-screen message appears. Once a guard is killed, a red circle called an Illusion Altar will appear. Up to 2 players can enter the circle to receive a buff which means they will be safe; if more than 2 players enter the circle, the buff will be lost. One of the guards at random will be fake and will spawn an Illusion Altar that does not grant any buffs.
If you die during the Hellfire attack, do not resurrect until Seind has finished his attack (when the countdown goes to 0). Once the attack is finished, the 6 Altar Guards will respawn and the fake guard will change locations.
Once you have killed Seind in his 1st phase, he will enter his 2nd phase.
Phase 2
Seind will take off his disguise and reveal his true form. Players should make sure they are gathered in the middle of the platform as Seind will summon Hellfire sea shortly after the 2nd phase begins. Standing in this fire will deal damage equal to 20% of the player’s health per second.
Shortly after, Seind will prepare the attack Thundershocker curse and cast it after 15 seconds. When the on-screen message for the Thundershocker curse appears, all players should move to one Mature Spirit Tree and kill it down to 10% Health. The tree will then protect players standing close to it for 20 seconds, granting them a fire immunity buff. The Spirit Tree will then disappear. If the party did not grow any Spirit Trees or does not kill the Mature Spirit Tree in time, Seind’s attack will kill all players.
Seind can repeat the Thundershocker curse multiple times during this phase so it is important that players only attack one Mature Spirit Tree at a time, and only when he is preparing to cast his attack.
Make sure that all players are alive and in range before Seind dies so that they can complete the dungeon’s daily quest. Once Seind is dead, Altar Attendant Barna will appear in his place where players can hand in their daily quest. If the player wants to boost their Vitae reward with the use of Ancient Gifts or other buffs, they should do so before handing in the quest. Once the daily quest has been handed in, the player will receive their rewards and be teleported out to Polydeux automatically.
Three Women Died (Hard Mode)
To activate this mode, hit the vines first instead of Saintess Anlu. The squad will have only one chance to attempt this challenge. If the squad fails they will receive a heavily reduced reward instead.
Protecting Saintess Anlu
If Saintess Anlu falls below 50% health, the squad will fail the challenge. If the squad successfully protects Saintess Anlu, then they will be able to complete the challenge as long as they kill the three maidens afterward.
Players are able to deal damage to Saintess Anlu still during this mode, so it is not advised to use AoEs. Yu Ling can use their Seal of the God skill on Saintess Anlu to protect her from accidental player damage.
The rewards that players receive from the dungeon depend on which mode was chosen, and whether players succeeded or failed to complete the mode. Players must have picked up the daily quest to receive the rewards.
Punish Seind (Easy Mode)
If players succeed to finish this mode, they will receive the following rewards:
- 20,000 Vitae
- Saintess’ Tear x12
- Barbaric Blood Crystal x10
Three Women Died (Hard Mode)
If players succeed to finish this mode, they will receive the following rewards:
- 20,000 Vitae
- Saintess’ Tear x12
- Glyph Pack LV3
If players fail to finish this mode, they will be teleported to a Secret Chamber. Take the quest “Anlu’s Wish” from the NPC there. You will receive a reduced reward based on the dialogue option you choose. Collect the Saintess’ Tear from the Wonder Bottle nearby, and then hand in the quest.
- Because of you we are trapped here and face the crisis!
- 2,500 Vitae
- Barbaric Blood Crystal x2
- You will also be killed
- Even if the Rau is destroyed, the source is the greed of human.
- 2,500 Vitae
- Saintess’ Tear x2
Exchange Options
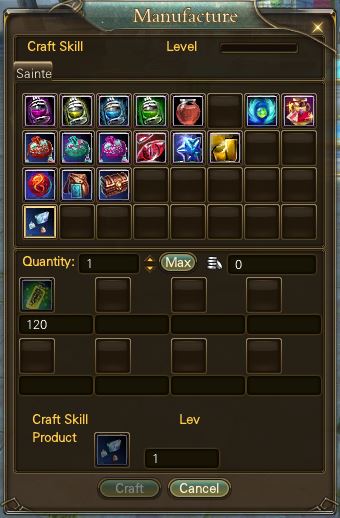
Players can use their Saintess’ Tears in exchange for rewards at Recruit Officer Taylor in Polydeux in the Western Steppes (536, 707).

